Managing Users
To manage users in the portal, a user must have Admin access. None of the other roles can manage users within the portal.
Admin vs. Non Admin Login
When a user logs in with an Admin role, the user icon on the top right will be colored orange. When non-admin users log in, their user icon will be colored blue. The color difference ensures admin users know they are operating at the highest possible level of access.


User Management Page
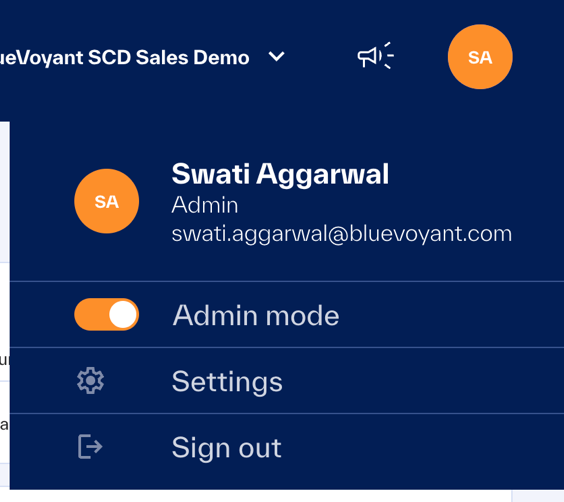
To get to the user management page, the user will need to hover over their person icon and then click on the Settings link in the menu that appears.
 |
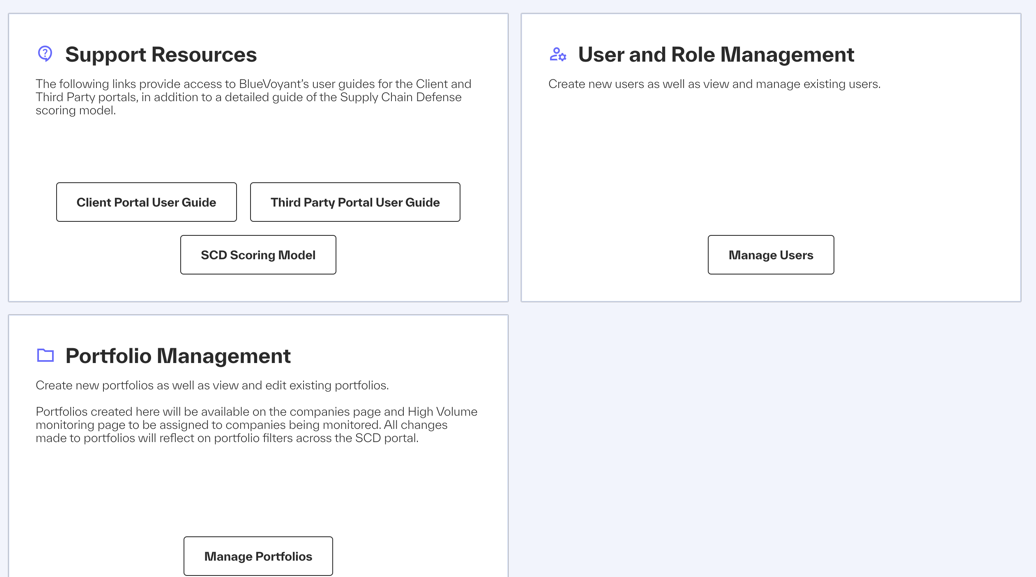
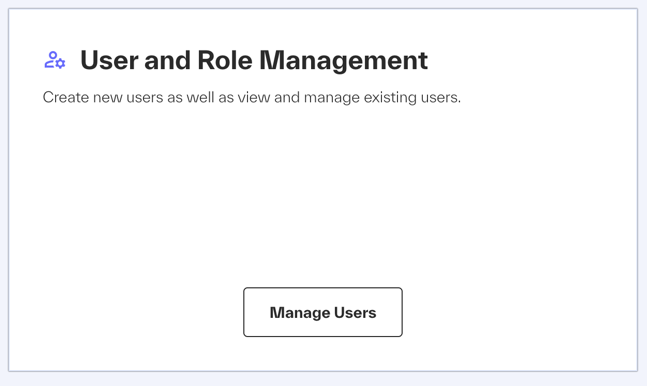
Once on the settings page, admin users will have a User and Role Management tile unavailable to other roles. To get to the user management page, click the Manage Users button at the bottom of this widget.
 |
 |
The user management page will enable client admins to view and manage the list of users with access to the TPRM portal. From this page, client admins will be able to:
Add new users
Manage existing users
View the list of users and view details on an individual user.
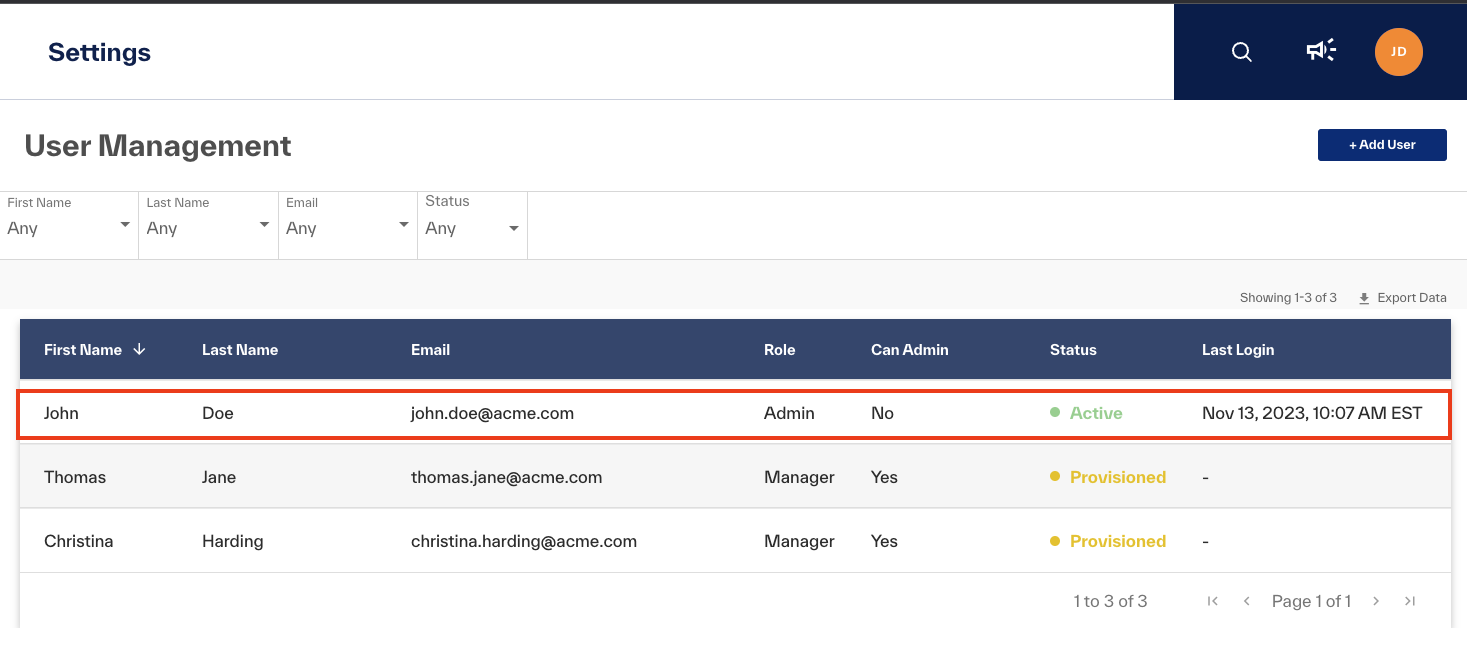
On the user management page, client admins will find the complete list of users with active or inactive access to the portal listed in a table. For each user, the table will display:
The user's first and last name
Their email address, which is also their username.
Their current role
Whether the user can access admin mode if their primary role is a non-admin role
Their current account status.
The last time they logged into the portal.
Account Status
The status of a user’s account can be one of the following:
Provisioned - Accounts have a provisioned status when they are provisioned, but the user has not provided verification by clicking through the activation email and completing their account setup by creating a password and setting up MFA.
Active - Accounts have an active status when the user has completed their account activation process and are able to access their account without issue.
Recovery - Accounts have a recovery status when a user requests a password reset or an admin initiates one on their behalf.
Locked Out - Accounts have a locked out status when the user exceeds the number of login attempts defined in the login policy.
Suspended - Accounts have a suspended status when an admin explicitly suspends them.
Deprovisioned - Accounts have a deprovisioned status when an admin explicitly deactivates or deprovisions them.
Adding a new user
You can add a new user by clicking the +Add User button on the top right of the User Management page. Clicking this button will bring up a modal where you can enter information about the user and create their account.
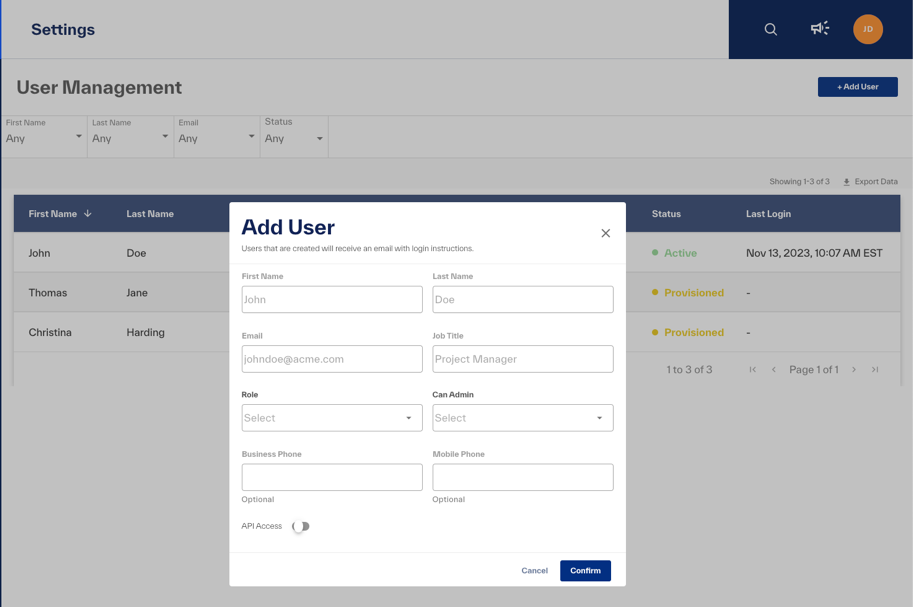 |
To create an account, you need to enter the following pieces of information about the user:
First Name - This field is required.
Last Name - This field is required.
Email address - This field is required and will become the username for the user and cannot be changed later.
Job title - This field is optional.
Role - This field is required, and you can choose from one of the four pre-defined roles.
Can Admin - This field is required and can be set to Yes or No.
Business Phone Number - This field is optional.
Mobile Phone Number - This field is optional.
API Access - This field is required, and by default will be set to false.
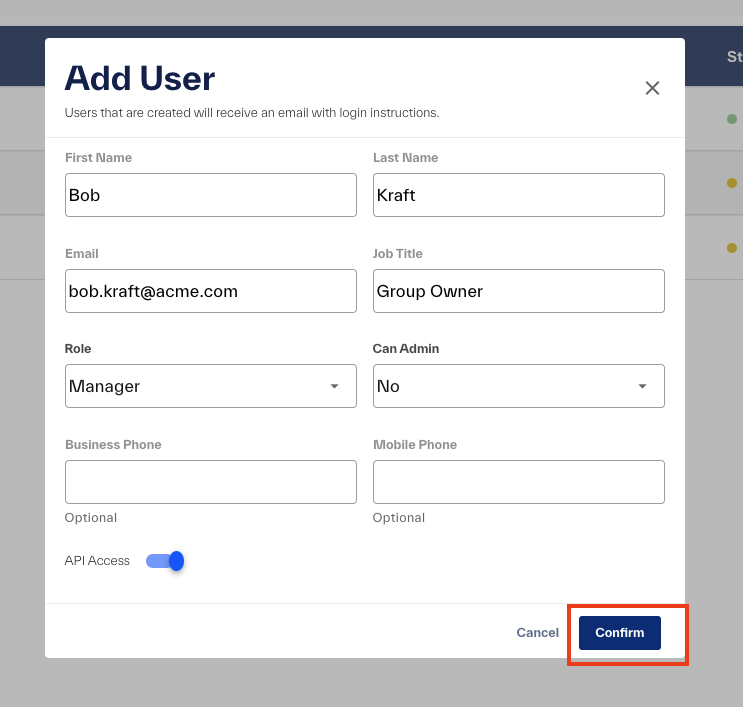 |
You can cancel the account creation by either clicking the cancel button on the bottom or by clicking on the X button on the top right of the modal. To create the user, you need to click on the confirm button once all required fields are submitted.
 |
Once you click the confirm button, you will be taken back to the user management list page, where you should get a confirmation message as a pop-up on the top right of the page. You should also see the user listed in the table with the status of provisioned.
API Access
The ability to generate API keys can be assigned at the user level and is not automatically available as part of a role assignment. Clients can provide individual users the ability to generate API keys from the portal and use them to retrieve information from the BlueVoyant TPRM Public API. The functions available to the user based on their current role will also define what they can do with the API.
Can Admin
The TPRM User Management solutions provide client users the ability to have access to the Admin role but operate at a lower permission level until they need it. This functionality is useful where client users are required by their corporate policies to operate at the least possible privilege and escalate their level of access when they need it.
Users with Can Admin set to Yes will have the option of enabling admin access to make changes and then reverting to their primary role afterward. By default, turning on admin mode will last 30 minutes, and the user’s role will switch back to their primary role after that.
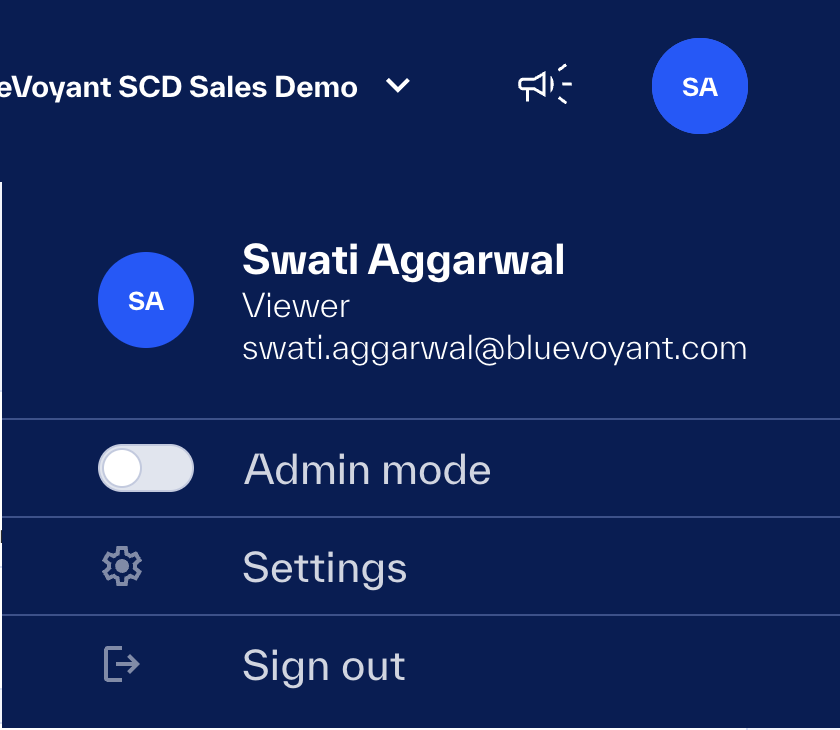
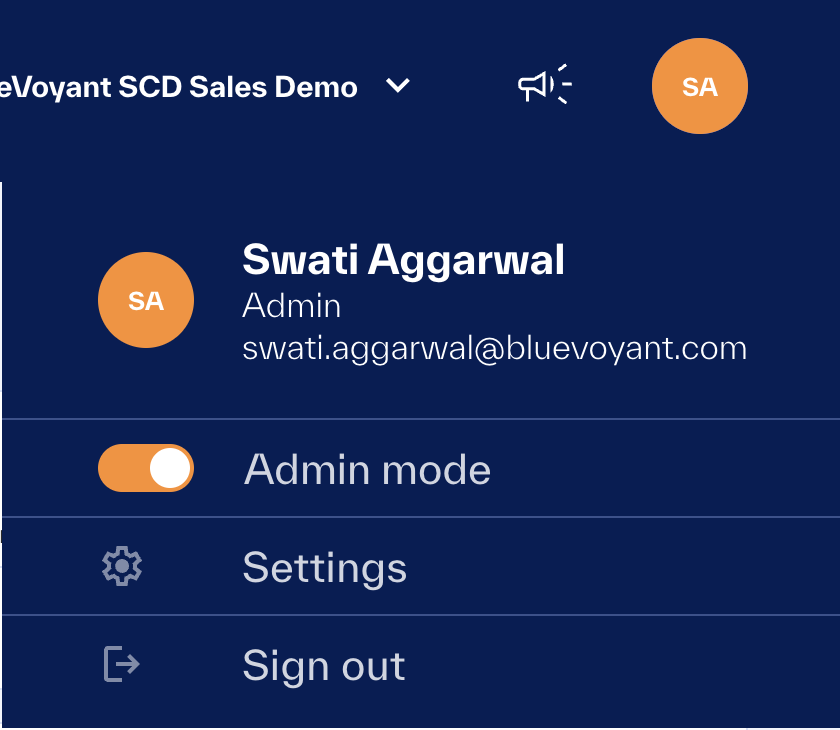
To turn on Admin mode, the user can hover over their person icon on the top right, and a menu should appear with the option to toggle Admin Mode on or off.
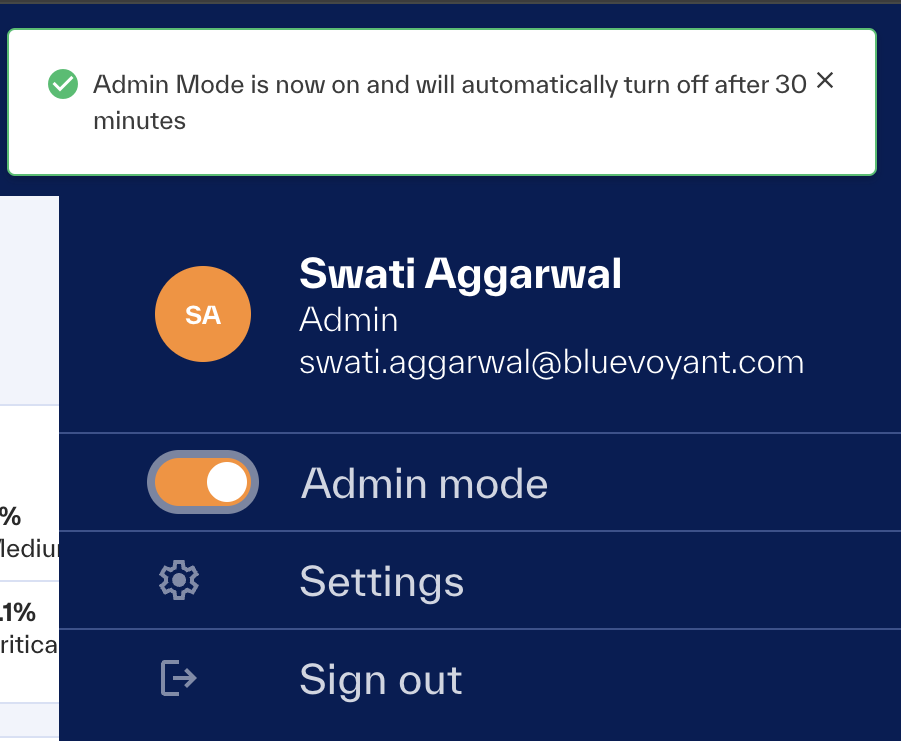 |
Once the user toggles admin mode on or off, they will receive a confirmation message on the top right of the page.
Editing existing users
To edit an existing user, click on their name in the user management table to bring up a modal where you can take actions on their account or edit the user's information.
 |
In the modal, you will be able to take action on the account, have the option to edit the user's information, and view information about the user, including additional information not shown in the user management list, such as:
Who created the account, and when
Who last updated the account, and when
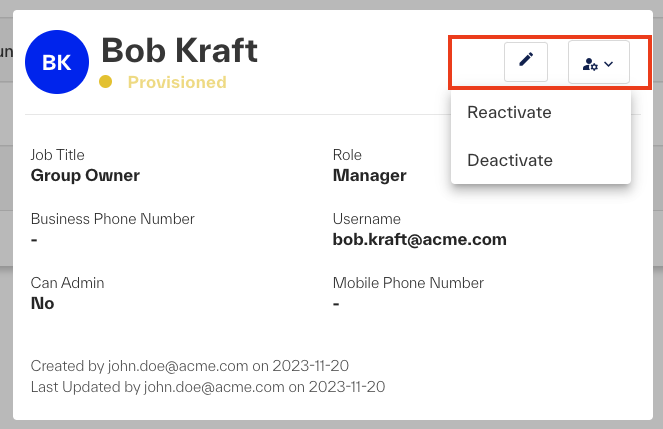 |
Clicking the pen icon lets you edit the user's account information, and clicking on the button to the right enables you to take action on the account.
Actions Possible on accounts
The user’s account status will determine what actions are possible on the account. You can refer to the table below to understand the actions possible.
Account Status | Activate | Deactivate | Reactivate | Suspend | UnSuspend | Unlock | Reset Password |
|---|---|---|---|---|---|---|---|
Provisioned | Y | Y | Y | ||||
Active | Y | Y | Y | ||||
Recovery | Y | Y | Y | ||||
Password Expired | Y | Y | Y | ||||
Locked Out | Y | Y | Y | Y | |||
Suspended | Y | Y | Y | ||||
Deprovisioned | Y |
Editing a user’s account
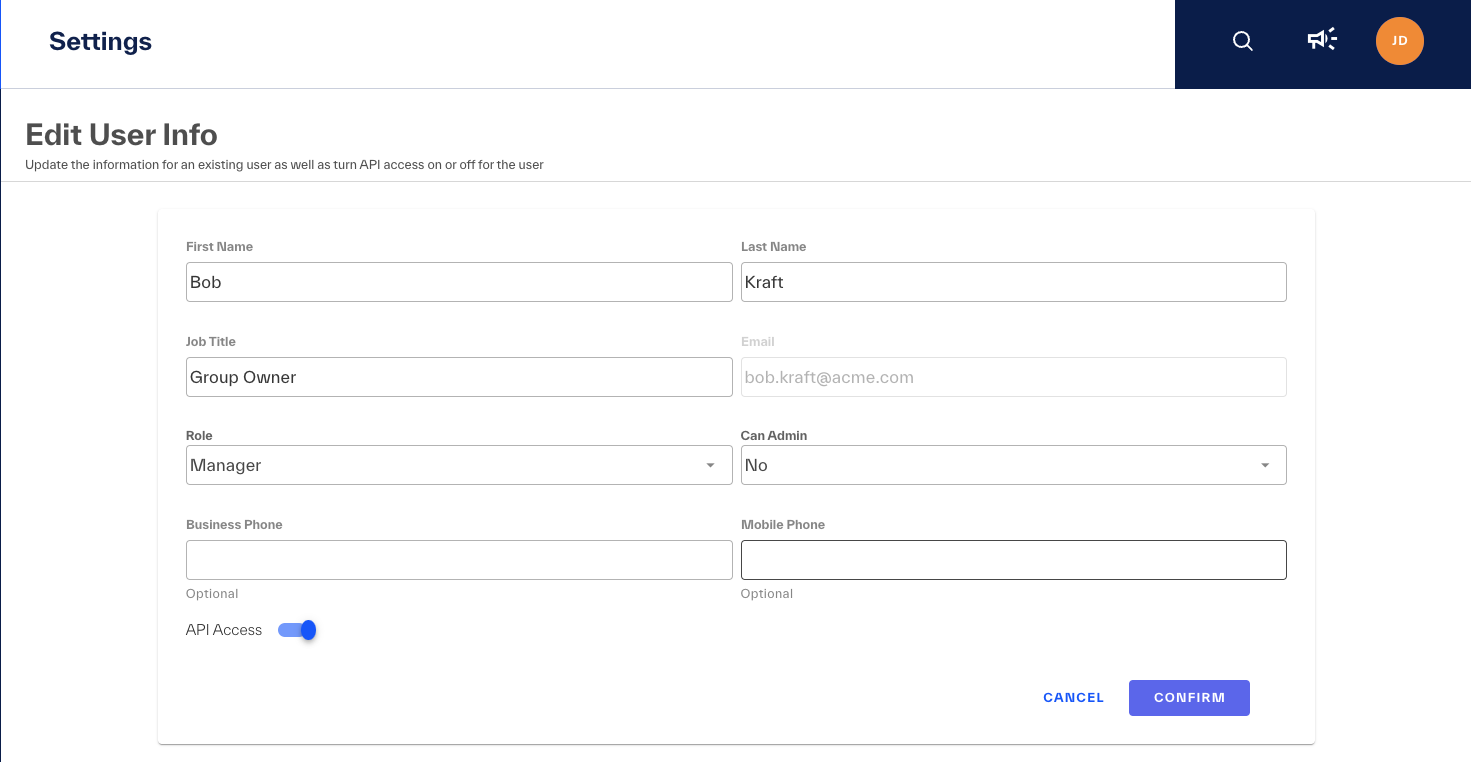
Clicking the pen icon on the modal will take you to the edit user page, where you can edit the user’s information, current role, and ability to enter admin mode and API access.
You cannot change the user’s email address as it is their current username. If an employee needs to change their username because of a change to their email, you can deactivate their existing account and create a new one with their new email address.
 |